


How to Replace Your Bike Gear Cable at Home
A shifter that clicks cleanly but leaves the chain hesitating between gears is rarely asking for a new groupset. More often, it is time to replace a bike gear cable. A fresh inner cable restores the direct, precise connection between shifter and derailleur - provided the housing is clean, the routing is correct and the derailleur is set up properly.
This is a satisfying home-maintenance job for road, gravel, mountain and commuter bikes. It needs patience rather than a full workshop, but a poor cable cut or rushed adjustment can leave you with shifting that feels worse than before. Work methodically and you will finish with a lighter lever action, quieter gear changes and a bike that is ready to ride.
When a gear cable needs replacing
Gear cables gradually collect moisture, road grit and dried lubricant, particularly where the cable enters housing sections beneath the bottom bracket or near the rear derailleur. On a regularly ridden UK bike, wet-weather commuting can shorten cable life considerably.
Slow shifts into harder gears, a lever that feels unusually heavy, frayed wire at the derailleur clamp, or indexing that changes from one ride to the next are strong signs the cable needs attention. If shifting is only poor in one or two sprockets, inspect the derailleur hanger and adjustment screws before fitting a cable. A bent hanger or worn drivetrain will not be cured by a fresh inner.
It is also worth checking the outer housing. Replace it if the liner looks contaminated, the ferrules are cracked, the housing is kinked, or the ends have been crushed. An inner cable moving through damaged housing cannot deliver crisp shifts, no matter how carefully it is adjusted.
Tools and parts for replacing a bike gear cable
Use a cable designed for your shifter type. Shimano-compatible and SRAM-compatible mechanical shifters commonly use a barrel-shaped cable head, while Campagnolo systems use a different shape. Check before opening the shifter or cutting anything.
For a professional, dependable result, gather:
- A compatible stainless steel inner gear cable
- New gear outer housing and ferrules if the existing housing is worn or contaminated
- Purpose-made cable cutters, not side cutters or pliers
- A 4 mm or 5 mm hex key for the derailleur cable clamp
- A pick or small awl, plus a cable end cap
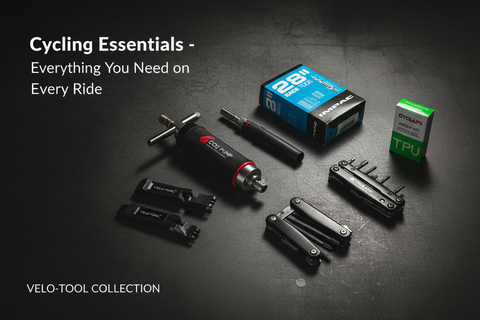
A compact ratchet kit is useful for access around frames, while a precision cutter and neatly stored spares turn this from a frustrating repair into a quick, repeatable piece of maintenance.
How to replace a bike gear cable
Start in a clean, well-lit space. Shift the chain into the smallest rear sprocket before disconnecting the cable. This places the rear shifter in its highest-gear position and releases most cable tension. For a front derailleur cable, shift to the smallest chainring first.
1. Release the old cable
Locate the cable pinch bolt on the derailleur. Loosen it enough to free the cable, then cut off the frayed end if necessary. Do not try to pull a badly frayed cable back through the housing or shifter: loose strands can catch inside and create a much bigger job.
Remove the old cable from the shifter. The access method varies. Some shifters reveal the cable head after shifting to a particular gear, while others have a small cover or port. Check the shifter body carefully rather than forcing any mechanism. Once the cable head is visible, push it out and pull the inner cable through.
Keep an eye on the old routing. Taking a quick photograph before removal is useful, especially on internally routed frames or handlebars with closely packed cables and hoses.
2. Inspect or renew the outer housing
If you are retaining the existing housing, pull each section free, wipe it down and inspect the ends. Make sure every ferrule is present and seated squarely in its frame stop, cable guide or derailleur adjuster.
Replacing housing is the better choice when the old cable was rusty or the bike has been ridden through a wet winter. Cut each new section to match the old one, allowing smooth curves with no tight bends. A housing run that is too short can pull as the handlebars turn; one that is excessively long adds drag and looks untidy.
For rear derailleur housing, check that the final loop into the derailleur remains smooth when the derailleur moves across the cassette. On a full-suspension mountain bike, cycle the suspension if possible and ensure the housing has enough movement without snagging.
3. Thread the new inner cable
Set the shifter fully into its highest-gear position again. Feed the new cable into the correct shifter port until the cable head seats fully in its recess. If it does not sit flush, do not continue. Remove it, check the shifter position and try again. A cable head that is only partly seated can slip later and instantly destroy your indexing.
Pass the cable through each housing section and frame stop in the same route as the original. Keep the cable clean as you work. There is no need to coat modern lined housing with thick grease, which can attract grit. A very light cable-specific lubricant may help on older unlined systems, but clean, correctly cut housing matters far more.
At the derailleur, wind the barrel adjuster almost fully in, then back it out one full turn. This leaves adjustment range in both directions once the cable is clamped.
4. Clamp the cable with controlled tension
Pull the cable through the derailleur anchor point until it is straight and lightly tensioned. Do not pull it as hard as possible. Excess tension can make initial adjustment awkward and can pull the derailleur slightly out of position.
Make certain the cable follows the correct side of the pinch-bolt washer or guide. Many derailleurs have a shaped path for the cable. Routing it on the wrong side changes the leverage ratio and produces inconsistent shifts.
Tighten the pinch bolt to the manufacturer’s specified torque. This is an ideal use for a compact torque tool: overtightening can damage a small bolt, while undertightening allows the cable to slip when you apply force to the pedals.
5. Set the indexing
Turn the cranks and shift one click from the smallest sprocket towards the next sprocket. If the chain hesitates to climb, add cable tension by turning the barrel adjuster anticlockwise in quarter-turn steps. If it wants to climb without a shift command, reduce tension clockwise.
Continue across the cassette one shift at a time. Make small changes, then pedal several revolutions before judging the result. A new cable often settles slightly after its first few shifts, so run through the full cassette several times and recheck the adjustment.
If the chain shifts cleanly in the middle of the cassette but struggles at either extreme, do not keep turning the barrel adjuster. Check the high and low limit screws, derailleur hanger alignment and cable routing instead. Indexing tension controls the relationship between shifter clicks and sprockets; it cannot compensate for a mechanically misaligned derailleur.
6. Finish the cable safely
Once shifting is consistent, leave around 40 to 50 mm of spare cable beyond the clamp. Cut it cleanly with cable cutters and fit a cable end cap. Crimp the cap firmly so the cable cannot unravel into sharp strands.
Turn the handlebars from lock to lock before riding. The housing should not pull tight, snag on luggage or lights, or alter the gear position. Then take a short test ride under moderate load. A shift that seems perfect on a workstand may need a quarter-turn adjustment when the drivetrain is under pedalling pressure.
Common mistakes that spoil fresh shifting
The most common error is replacing only a rusty inner cable while leaving contaminated outer housing in place. It may improve for a few rides, then drag returns. Another is cutting housing with unsuitable cutters, flattening the liner and building friction into every shift.
Internal cable routing deserves extra care. If you remove all housing and cable at once, finding the route again can be time-consuming. On some frames, feeding the new cable through before removing the old housing, or using a guide liner, makes the job far easier. If the route has tight bends inside the frame and you are not confident, a workshop can save time and prevent cosmetic damage.
Electronic shifting does not use a conventional mechanical gear cable, so this process applies only to cable-operated systems. Likewise, if your cable repeatedly frays at the shifter, inspect the cable port and mechanism for a burr rather than simply fitting another inner.
A fresh cable is a small component with a large effect on how a bike feels. Keep a spare inner cable, end caps and quality housing in your home kit, and a routine repair becomes a quick reset before the next commute, club run or trail day.


Post Comment