

How to Repair a Broken Bike Chain Roadside
A snapped chain can stop a club ride, commute or trail day instantly, often when you are furthest from home. The good news is that to repair a broken bike chain, you do not need a full workshop. A compact chain tool, the correct quick link and a few careful checks are usually enough to get moving again without compromising the rest of the drivetrain.
What you need to repair a broken bike chain
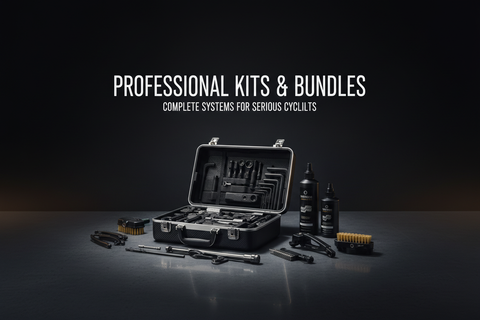
The most reliable roadside setup is a professional-grade compact chain tool and at least one spare quick link that matches your chain speed. Your chain speed refers to the number of sprockets on the rear cassette: 8, 9, 10, 11 or 12 speed. A quick link must match the chain's width and design. An 11-speed link may look close to a 10-speed link, but it is not a safe substitute.
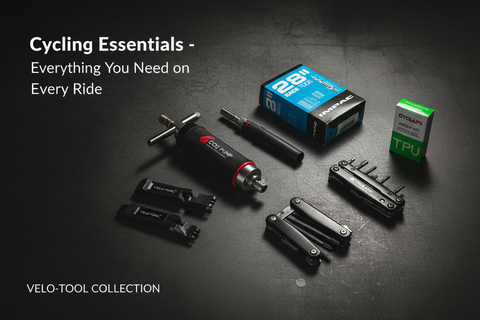
Keep the spare link in a waterproof tool case with tyre levers, a mini pump or CO2 inflator, and a multitool. It weighs very little, yet it solves one of the few mechanical failures that cannot be ridden home around. Disposable gloves or a small rag are worthwhile too. Chain grease is difficult to remove from bar tape, gloves and clothing.
At home, a stable workstand makes the job easier, but it is not essential. Shift the chain onto the smallest rear sprocket and smallest front chainring where possible. This relaxes chain tension and gives you room to work. If the chain has already snapped, gently place it on the small sprocket rather than forcing the derailleur backwards.
Inspect the damage before fitting a link
Do not immediately push the broken ends together. First find out why the chain failed. A chain can break after a hard gear change under load, a jammed stick on an MTB ride, a worn or stiff link, a damaged derailleur or an incorrectly installed joining pin. If you only reconnect the chain without addressing the cause, the same failure can happen again under the next hard pedal stroke.
Look for twisted, cracked or spread outer plates on both sides of the break. Check whether a roller is missing and whether the chain pin has partially worked out. A damaged plate cannot be made dependable by pushing a pin back into it. Remove the compromised link completely.
Then inspect the derailleur cage, jockey wheels and cassette. If the derailleur hanger is bent into the spokes, the chain is badly twisted, or the cassette has damaged teeth, a roadside repair may not be safe. Walking, getting a lift or using public transport is the better call than risking damage to the wheel, frame or yourself.
Check chain wear as well
A heavily worn chain is more likely to fail and can accelerate wear on the cassette and chainrings. At home, measure it with the Professional Chain Wear Tool - Precision 304 Stainless Steel Gauge. Our chain wear gauge guide explains how to take a reading. If it is beyond the recommended limit for your drivetrain, fitting a quick link is a sensible temporary fix, but replace the full chain before relying on the bike for regular riding.
Remove the damaged section cleanly
Use the Professional Chain Splitter Tool - Heavy-Duty Pin Pusher with Integrated Hook to push out the pin from the damaged link. Position the chain squarely in the tool's cradle, then turn the handle slowly until the pin is driven clear. Keep the tool aligned. Pushing at an angle can bend the tool's driving pin or flare the chain plate.
For most modern derailleur chains, remove enough links to leave two clean inner-link ends. That is because a standard quick link joins two inner links. Check the link packaging or markings before cutting: some systems use a different joining arrangement, particularly on certain single-speed, track and e-bike chains.
Avoid removing more chain than necessary. Every link removed shortens the drivetrain, and a chain that is too short can overstretch the rear derailleur when you shift into the largest sprocket and large chainring. On a double chainset, this is the critical combination to assess.
If the chain broke at an existing quick link, inspect both halves closely. Do not refit a link that is cracked, distorted or difficult to articulate. Many modern quick links are specified for single use, particularly on 11- and 12-speed systems. Follow the chain manufacturer's guidance rather than assuming any link can be opened and closed repeatedly.
Fit the quick link and lock it in place
Feed the chain correctly through the rear derailleur. It should run over the upper jockey wheel, inside the cage plates, then under the lower jockey wheel. Misrouting around the small metal tab between the jockey wheels is a common roadside mistake and creates poor shifting or a locked drivetrain.
Insert one half of the quick link into each inner-chain end. Bring the halves together, pull the chain so the link engages, then position the quick link on the upper straight run of chain between the cassette and chainring. Hold the rear brake firmly and press down on a pedal, or use dedicated quick-link pliers such as the Professional Mini Quick Link Pliers - Compact Chain Tool with Hook, until you feel and hear the link seat into its locked position.
Do not stamp on the pedal. A controlled, firm load is enough. Once locked, flex the link sideways gently and rotate the cranks backwards. It should move freely through the derailleur jockey wheels without a click, skip or tight spot.
When a chain tool pin is the right answer
Some chains are designed to be joined using a specific replacement connecting pin rather than a quick link. This is different from simply reusing the pin you pushed out. If your chain maker supplies a purpose-made joining pin and you have the right chain tool, follow its fitting method exactly.
For most riders carrying a repair kit, a correctly matched quick link is faster, cleaner and less error-prone. It also allows the damaged section to be removed without trying to make a compromised pin connection survive high pedalling loads.
Test the repair before you ride hard
With the rear wheel off the ground if possible, turn the cranks slowly and shift across a few sprockets. Listen for a regular tick, which can point to a stiff link. If the quick link does not bend smoothly, place it in the chain tool and apply very slight side-to-side flexing to free it. Do not force the tool's pin into the quick link itself.
Next, check that the chain can reach the largest rear sprocket without the derailleur being pulled fully forward. Avoid the big chainring and biggest sprocket combination on a road or gravel bike anyway, as it adds unnecessary cross-chaining, but the drivetrain must still have enough capacity to reach it safely.
Start riding in an easy gear. For the first few minutes, avoid sprinting, steep climbs and aggressive shifts under pressure. If the chain skips, jumps off a sprocket, or the repaired section feels rough through the pedals, stop and inspect it. A repair that holds on the workstand but fails under torque needs attention before continuing.
Avoid the next broken-chain moment
Chains rarely fail without warning. Clean and lubricate yours regularly, especially after wet UK rides, gritty winter commutes and muddy trail days. Wipe off excess lubricant after application: a wet, over-oiled chain attracts abrasive dirt that wears pins and rollers faster.
Shift with a lighter pedal load, particularly when moving onto a larger sprocket on a climb. Modern drivetrains shift brilliantly, but no chain enjoys being forced across the cassette while you are standing on the pedals. If shifting becomes hesitant, investigate cable tension, derailleur alignment and chain wear before it becomes a trailside problem.
A compact chain tool and speed-specific quick link are small pieces of kit with a big job. Velo-Tool riders can keep them alongside their inflation and puncture essentials, ready for the moment a simple, precise repair turns a mechanical stop into the rest of the ride.


Post Comment