

Build a Bike Workshop Starter Kit That Lasts
A slipping chain on the morning of a club ride, a puncture after work, or a cockpit bolt that will not stay put - these are the jobs a well-chosen bike workshop starter kit is built for. You do not need a full commercial workshop to keep a bike dependable. You need a compact set of professional-grade tools that fits the jobs you actually do, works accurately, and is ready when a small fault threatens to become a missed ride.
For most UK cyclists, the best starting point is not a huge box of specialist equipment. It is a precise core kit for wheels, tyres, fasteners and drivetrain care, supported by a few consumables you will replace over time. Start there, learn what your bike needs, then add workshop tools as your maintenance confidence grows.
What a bike workshop starter kit should cover
A useful home kit should let you complete routine checks and solve the common failures without improvising with household tools. That means fitting and repairing inner tubes or tubeless tyres, inflating accurately, tightening bolts to the right setting, cleaning and lubricating the drivetrain, and dealing with a chain problem.
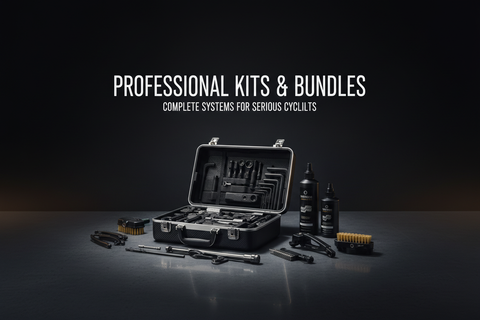
It should also be compact enough to store properly. Tools left loose in a shed drawer collect moisture, get separated from their bits and often go missing just when they are needed. A waterproof tool pouch, hard case or organised storage roll keeps a small collection ride-ready and makes it easier to see what needs replacing.
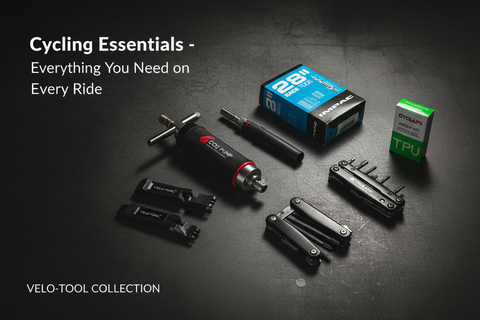
There is a difference between workshop kit and roadside kit, although there is plenty of overlap. At home, a floor pump and torque tool make sense. On the road or trail, a lightweight mini pump or CNC aluminium CO2 inflator, tyre levers and a tubeless repair kit earn their place. Buying equipment that serves both roles first gives you better value and fewer duplicate tools.
Start with inflation and puncture repair
Tyres are the most frequent source of ride-ending trouble, so inflation and puncture repair deserve priority. A reliable pump is more useful than an oversized collection of niche spanners. For home use, choose a pump with a stable base, an easy-to-read gauge and a head compatible with Presta valves, which are standard on most road, gravel and performance MTB wheels.
A compact mini pump is slower, but it is essential on longer rides, commutes and trips where a CO2 cartridge alone may not be enough. CO2 inflators are exceptionally fast and small, particularly for road riders carrying limited kit. They do have a trade-off: cartridges are single-use, and rapid inflation can leave a tyre cold. Carry a pump for self-supported riding, or pair an inflator with enough threaded cartridges for your route and tyre volume.
Add strong tyre levers, spare TPU or butyl inner tubes, a puncture repair kit and spare valve cores. TPU tubes pack down remarkably small, making them ideal for a saddle bag, but they need careful fitting and the correct patch system. Traditional butyl tubes are bulkier but more forgiving. Neither is automatically better - choose around available space, tyre size and the type of riding you do.
For tubeless riders, include plugs, an insertion tool and sealant. A plug can repair a hole that sealant cannot close, while a valve-core tool makes topping up sealant cleaner and faster. Check your sealant every few months, especially after a dry summer or before an event. Tubeless is low-maintenance rather than no-maintenance.
Precision tools for secure components
Modern bikes use lightweight parts, carbon components and small fasteners that need controlled tightening. A torque system should be one of the first precision upgrades in a bike workshop starter kit. It prevents the two expensive mistakes: over-tightening a stem bolt, seat clamp or carbon rail, and leaving a critical bolt too loose.
A preset torque key is compact and excellent for regular roadside-style checks, while an adjustable torque wrench covers a wider range of jobs at home. Whichever you choose, ensure it includes the hex and Torx bits your bike uses. Check the torque values printed on the component itself or in its instructions rather than guessing. The value for a stem faceplate is not necessarily the value for a seatpost clamp, even if the bolts look identical.
A quality multi-tool remains useful even when you own dedicated tools. Look for correctly sized hex keys, Torx bits and a chain tool in a solid, compact body. Dedicated L-shaped hex keys offer more leverage and control for regular home work, but a multi-tool is the fast answer for a pre-ride adjustment or a loose bottle cage bolt.
Use grease or assembly paste where specified, clean bolt threads before refitting, and tighten bolts evenly in stages. Precision is not just about the number on the torque tool. It is also about clean contact surfaces and a measured approach.
Keep the drivetrain moving efficiently
A clean, lubricated drivetrain feels better, shifts more accurately and costs less to run. Your starter kit does not need an elaborate cleaning station. Begin with a chain cleaning brush, a stiff general-purpose brush, clean cloths, drivetrain cleaner and suitable chain lube.
Wet lube lasts well through British winter roads and muddy lanes but can attract more grit if applied heavily. Dry lube keeps a cleaner chain in fair conditions but needs more frequent application, particularly after rain. Apply lube to the rollers, turn the cranks backwards to distribute it, then wipe away excess from the outside of the chain. More lubricant is not better - it simply creates a paste of oil and road grit.
A chain wear gauge is a small tool with a large payoff. It tells you when a chain has elongated through use, allowing you to replace it before it accelerates wear on the cassette and chainrings. Riders covering frequent road miles may check monthly; muddy mountain bike and gravel riders should inspect after hard conditions. If you are fitting a new chain, a compact chain tool and quick-link pliers turn an awkward job into a straightforward one.
Add stability before tackling bigger jobs
A display stand or basic work stand is not essential on day one, but it quickly becomes valuable. Lifting the rear wheel makes cleaning, lubrication and gear checking far easier than leaning the bike against a wall. A stand also protects paintwork and avoids working at floor level.
For early maintenance, avoid buying specialist tools for jobs you will not perform. Bottom bracket tools, cassette lockring tools, bearing presses and hydraulic brake bleed kits are useful when required, but their correct choice depends on the exact standard fitted to your bike. Buying these too early can mean owning a tool that is almost right, which is rarely useful.
Once you start replacing cassettes, add the correct cassette lockring tool, a chain whip or holding tool, and a ratchet kit with compatible sockets. When servicing disc brakes, use only the pads, fluid and bleed fittings specified for your system. Brakes and carbon assemblies are areas where the right tool, correct torque and manufacturer procedure matter more than speed.
Build the kit around your riding
Road and commuter riders usually benefit most from fast inflation, compact storage, torque control and drivetrain care. Gravel riders should give extra attention to tubeless repair, larger-volume tyre inflation and a chain tool. Mountain bikers may put tyre plugs, a more capable mini pump, spare links and trail-proof storage at the top of the list.
A practical core collection contains a pump or inflator, tyre levers, tube or tubeless repair equipment, multi-tool, torque tool, chain tool, cleaning supplies, lubricant and secure storage. From there, buy specialist tools only when a maintenance task becomes regular enough to justify them.
Velo-Tool kits are designed around that principle: dependable, compact equipment for the jobs that stop rides and the checks that keep them running smoothly. Keep the essentials clean, replace consumables before they run out, and make a short pre-ride check part of your routine. The best workshop kit is the one that gives you the confidence to fix the small things before they become a reason not to ride.


Post Comment