

How to Replace Valve Core on a Bike Tyre
A tyre that slowly loses pressure can turn a quick evening ride into a frustrating pump-up routine. Before blaming the tube, tubeless tape or tyre casing, check the small removable component inside the valve. To replace valve core on a bike tyre is usually a fast, low-cost repair, and it can stop an irritating leak without removing the tyre from the rim.
For road, gravel and mountain bike riders using Presta valves, a fresh core is particularly useful after sealant contamination, accidental damage or a stubbornly leaking valve. With a proper valve-core tool in your repair kit, it is a practical job at home, by the car park or at the trailhead.
When should you replace a valve core?
The valve core is the threaded mechanism inside a removable Presta valve stem. It opens when you inflate the tyre and seals when the pump head is removed. On tubeless setups, it also has to work around liquid sealant, which is excellent for puncture protection but can eventually dry around the core or block its narrow air path.
A core may need replacing if the tyre loses air when the valve cap is fitted, if you can hear a faint hiss from the valve, or if the pump head will not inflate the tyre cleanly. A bent centre pin, damaged threads or a core that has seized in place are equally good reasons to fit a new one.
Do not confuse a leaking core with a leaking valve base. If bubbles appear where the valve meets the rim when you use soapy water, the issue may be the valve’s rubber gasket, rim tape or the valve nut rather than the core itself. Replacing the core will not cure a poor valve-to-rim seal.
What you need before starting
This is a compact repair, but precision matters. You need a compatible replacement valve core, a valve-core remover or multi-tool with a core-removal slot, and a pump or CO2 inflator to check the result. A cloth is useful for cleaning away sealant. For a tubeless tyre, keep a small amount of sealant nearby in case the tyre has lost fluid during the repair.
Most modern removable Presta cores use a standard thread, but it is still sensible to check the replacement against your existing valve. Avoid forcing a core that does not thread in smoothly. Schrader valves, commonly found on some hybrid, commuter and children’s bikes, also use removable cores in many cases, but require a compatible Schrader tool and core.
If you are preparing a ride-ready repair setup, keep two or three spare Presta cores with your tyre plugs, mini pump or CO2 cartridges. They weigh almost nothing and can save a ride when a core becomes blocked by sealant miles from home.
How to replace valve core safely
1. Position the valve at the top of the wheel
Rotate the wheel so the valve is at the 12 o’clock position. This is especially worthwhile with a tubeless setup because it keeps liquid sealant lower in the tyre, away from the valve opening. Remove the dust cap, then unscrew the small Presta locknut fully.
If the tyre is still holding pressure, release the air slowly by pressing the centre pin. For a tube setup, fully deflate the tyre before removing the core. For tubeless, full deflation is usually best for a damaged or badly clogged core, although a quick core swap can sometimes be completed with a small amount of pressure remaining. The latter is messy and not ideal for first-time maintenance.
2. Remove the old core with the correct tool
Fit the core-removal tool over the flats at the top of the valve core. Turn it anti-clockwise with steady, controlled pressure. The core should loosen without a fight. If it feels seized, do not apply excessive force that could twist or damage the valve stem.
Once loose, finish removing it by hand and place it somewhere clean. Inspect it closely. Dried sealant around the spring and rubber seal confirms the likely cause of the issue. A core that looks clean may still have a damaged seal, so replacement remains the more dependable option when air loss has been traced to the valve.
3. Clean the valve stem and fit the replacement
Wipe the top of the valve stem with a clean cloth. If there is visible dried sealant inside the stem, carefully clear only what you can reach without pushing debris deeper into the tyre. Do not use a sharp object that could score the threads or damage the valve.
Thread the new core in by hand first. It should engage easily and sit straight. Once finger-tight, use the core tool to tighten it gently. It needs to be secure enough to seal, not clamped down with workshop-level force. Over-tightening can damage the core seal, strip fine threads or make the next roadside replacement unnecessarily difficult.
4. Inflate and test the repair
Inflate the tyre to an appropriate pressure for your bike, tyre width, rider weight and riding conditions. Road riders may use higher pressures than gravel or mountain bike riders, while tubeless systems are often run lower for grip and comfort. Use your usual pressure as the test point rather than inflating beyond it.
Listen closely around the valve. If you suspect a very slow leak, put a drop of soapy water over the core. Continuous bubbles indicate air escaping. First, try tightening the core by a very small amount. If bubbling continues, remove the core, inspect the threads and seal, then try another replacement core.
Once it seals correctly, screw the Presta locknut down to the open position before fitting the valve cap. The cap keeps road grime out of the valve but is not a substitute for a functioning core.
Tubeless valve-core problems and sealant blockages
Tubeless riders tend to encounter valve-core issues more often because sealant travels through the valve during inflation and top-ups. The simplest prevention is to position the valve near the top of the wheel before removing a pump head, adding sealant or releasing air. This reduces the amount of liquid sitting directly behind the core.
A blocked core does not always need replacing immediately. If it is lightly contaminated, remove it and soak or clean it with an appropriate cleaner, then allow it to dry before refitting. That said, spare cores are inexpensive and compact, and a new core offers more certainty when you need reliable inflation before a ride.
If your tyre will not inflate after fitting a clean core, the obstruction may be deeper in the valve stem. Remove the core again and use a controlled burst of air through the open valve stem to clear it, keeping your face away from the valve. If that does not work, replacing the complete tubeless valve may be quicker and more reliable than repeatedly trying to clear an old, heavily contaminated stem.
Common mistakes that create a new leak
The most frequent mistake is using pliers or an improvised tool. Valve cores are small, soft components, and damaged flats make future removal difficult. A dedicated valve-core tool gives far better purchase while remaining compact enough for a saddle bag, frame storage or waterproof tool case.
Another mistake is assuming every pressure loss comes from the core. Check the tyre tread for a tiny puncture, inspect the rim tape around spoke holes and examine the valve base for movement. On an inner tube, a split around the valve base usually means the tube needs replacing. No amount of core tightening will repair torn rubber.
Finally, avoid relying on CO2 alone after a tubeless repair if you can help it. CO2 is excellent for rapid roadside inflation, but some sealants can react poorly or dry differently after repeated CO2 use. At home, a track pump or electric pump is the better choice for a controlled pressure check and regular maintenance.
Build a valve repair kit that earns its space
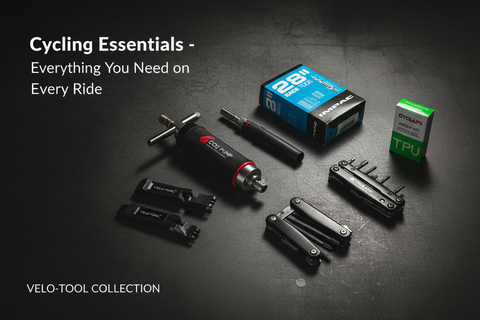
A reliable valve repair kit does not need to be bulky. Carry a compact core tool, spare Presta cores, a few tyre plugs for tubeless punctures and a dependable inflation option. Add tyre levers and a TPU inner tube if you want a complete fallback for larger cuts or tubeless failures.
Velo-Tool’s compact, professional-grade approach suits this kind of preparation: small components, properly chosen, can solve the faults most likely to interrupt a ride. The aim is not to carry a mobile workshop. It is to carry the precise equipment that gets the wheel turning again.
The next time a tyre starts losing pressure without an obvious puncture, start at the valve. A clean, correctly fitted core takes minutes to install, costs far less than a new tube or valve, and gives you one more repair you can handle before the ride gets away from you.


Inserisci commento