

Bike Valve Leaks: Find and Fix Them Fast
A tyre that feels soft again minutes after inflation is rarely a mystery puncture. Bike valve leaks are a common, fixable cause of lost pressure, whether you ride a high-pressure road bike, a commuter, gravel machine or tubeless MTB. The key is identifying exactly where air is escaping before reaching for a new tube or tyre.
A valve issue can cost very little to solve, but it can also leave you stranded if your repair kit lacks the right small parts. A compact valve-core tool, spare cores and the correct pump or CO2 inflator take up almost no room, yet they can turn an irritating roadside problem into a two-minute repair.
How to identify bike valve leaks
First, inflate the tyre to a sensible pressure for its size and riding style. Listen closely around the valve, then put a little water on the suspected area. Soapy water is best: steady bubbles reveal the escape point. At home, a bowl of water makes diagnosis even clearer, although you should dry the valve thoroughly afterwards.
Check four areas: the valve tip and core, the valve stem, the base where the valve enters the tube or rim, and the rim tape area on a tubeless wheel. These failures can feel similar at the pump, but each has a different remedy.
If pressure disappears only after you remove the pump head, the pump may be the culprit rather than the valve. A worn seal in a pump head, an incorrectly adjusted Presta chuck or a poorly fitted CO2 inflator can release air during inflation. Test it on another wheel before dismantling the tyre.
A leak from the valve core
The valve core is the small, removable mechanism inside many Presta and Schrader valves. It seals when tightened and opens briefly when you inflate the tyre. A loose, contaminated or damaged core is one of the quickest fixes on the bike.
With the tyre deflated, use a dedicated valve-core tool to tighten the core gently. It needs to be snug, not aggressively tightened. Overtightening can damage the core, particularly on lightweight alloy valve stems. Inflate again and repeat the bubble test.
If the leak continues, remove the core and inspect it. Dried sealant, grit and corrosion can stop the tiny rubber seal from seating correctly. Wipe away residue where possible, but replacement is usually the more dependable option. Valve cores are inexpensive consumables, so carrying a couple is more practical than trying to rescue a visibly worn one at the roadside.
A leak at the valve stem or tube base
Air escaping from the stem itself, or from the joint between the stem and inner tube, usually means the tube has failed. On a standard butyl or TPU inner tube, the valve is bonded to the tube and is not normally a repairable component. Replace the tube, then inspect the rim hole for sharp edges or burrs that could damage the replacement.
A split at the base of the valve is often caused by riding with insufficient pressure, allowing the tyre and tube to creep around the rim under braking or hard pedalling. The valve is then pulled sideways. Make sure the valve sits straight through the rim hole and maintain pressure appropriate for your tyre, rider weight and terrain.
Do not assume every leak near the base is a failed tube. On tubeless wheels, sealant bubbling around the valve base commonly points to a poor seal between the valve’s rubber grommet and the rim bed.
Fixing a leaking Presta valve
Presta valves are standard on most road, gravel and higher-performance mountain bikes. Their narrow profile suits smaller rim holes, but their threaded tips and removable cores introduce a few more checks.
Start by unscrewing the small locknut at the tip fully before attaching a pump or inflator. The locknut is not an air seal - the core is. If the locknut is only partly open, the pump head may not engage correctly, and forcing it can bend the delicate central pin.
Where a removable Presta core leaks, tighten or replace the core as described above. If sealant has clogged the core, remove it before adding more sealant to the tyre. A blocked core can make inflation painfully slow and can give the false impression that a pump or cartridge has failed.
If air escapes around the external threads at the top of the valve only while inflating, check your pump head. Some threaded CO2 inflators require careful alignment and a firm seal before the cartridge is released. A precision-machined CO2 inflator with controlled gas delivery helps avoid wasting a cartridge and prevents the sudden freeze that can make handling difficult.
Not every Presta valve has a removable core. If it does not unscrew with a valve-core tool, do not force it. A leaking fixed-core valve generally means replacing the inner tube or, on some tubeless set-ups, replacing the entire valve.
Schrader valve leaks and their simple fixes
Schrader valves are wider and more familiar to many commuter and leisure riders because they use the same basic format as car valves. They are durable, easy to inflate at many public pumps and normally use a removable core.
A Schrader valve leaking through the centre usually needs its core tightened or changed. Depress the centre pin briefly with a suitable tool after deflating the tyre to clear superficial dirt, then fit a replacement core if the leak remains. Never use an unprotected finger near a pressurised valve - escaping air and debris can be sharp and sudden.
Check that the valve cap is present, but do not treat it as the primary seal. A cap protects the core from water and grit; it will not reliably stop a faulty core from leaking. For all-weather commuting, that protection matters. Road spray and grime can gradually compromise a valve that initially appears fine.
Tubeless bike valve leaks need a different approach
Tubeless valves must seal against the inside of the rim while also allowing sealant to pass through the core. That makes them more exposed to dried sealant and fitment errors than a conventional inner-tube valve.
If sealant appears around the valve base, release the air, remove the valve core and unthread the retaining nut on the outside of the rim. Pull the valve out, then clean sealant from the rubber base, valve hole and rim bed. Refit the valve so its rubber grommet lies flat against the rim interior. Tighten the external nut finger-tight, then add only a small further turn if necessary. Pliers can distort the seal, mark the rim and make later removal difficult.
The rim tape deserves equal attention. A leak that seems to come from the valve base may be travelling beneath damaged tape and emerging at the nearest opening. Inspect for lifted tape edges, tears around spoke holes or an oversized valve hole. If the tape is compromised, replace it properly rather than repeatedly adding sealant and hoping it will mask the problem.
Tubeless valves also need enough length to extend cleanly beyond the rim. A valve that is too short is difficult to inflate and can make an inflator sit at an angle, risking a poor seal. For deep-section road wheels, choose an appropriately long tubeless valve rather than relying on a precarious extender arrangement.
Avoid repeat valve problems on the road and trail
A few disciplined habits prevent most repeat failures. Keep valve caps fitted, particularly on gravel bikes, MTBs and year-round commuters. Open Presta locknuts fully before fitting a pump head, and avoid pulling the hose sideways while it is attached. When using CO2, engage the inflator squarely and use controlled delivery, as a rapid blast can make it harder to judge pressure and can chill the valve assembly.
For tubeless riders, inspect and clean valve cores whenever you refresh sealant. If the tyre will not inflate freely, the core is often partly blocked. Removing it temporarily can improve airflow when seating a stubborn tubeless tyre, provided you are ready to refit it quickly once the bead is seated.
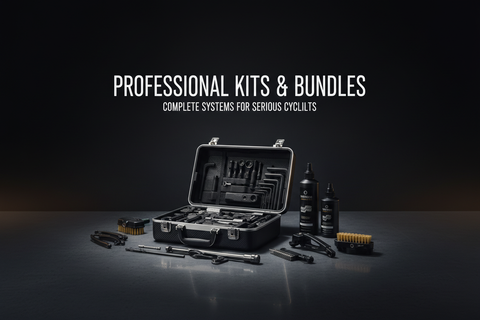
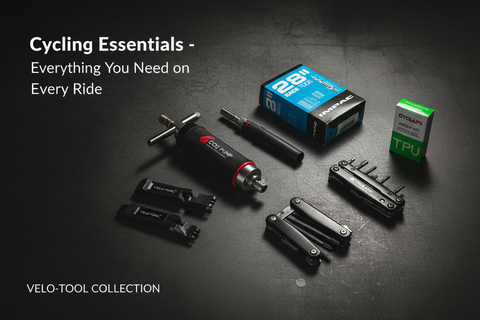
Your ride-ready puncture kit should cover more than the puncture itself. Carry tyre levers, a compatible mini pump or CO2 inflator, a spare inner tube where appropriate, tubeless plugs for tubeless tyres and a small valve-core tool with spare cores. For longer rides and events, a spare tubeless valve is a sensible addition. These parts weigh very little but address the failures that leave otherwise sound wheels unusable. For a bundled option, explore the Essential Tubeless Repair Kit Bundle.
At home, check valve condition whenever you inspect tyre wear or clean the bike. That is also the right moment to confirm that valve stems are straight, retaining nuts are not overtightened and the pump head is still sealing cleanly.
A leaking valve is frustrating because it can imitate a bigger problem. Diagnose the exact escape point, use the right precision part and test the repair before setting off. With a properly equipped compact kit from Velo-Tool, a small valve fault stays exactly that - a small fault, not the end of the ride.


Inserisci commento