


How to Set Bike Derailleur Limits Properly
A chain thrown beyond the largest sprocket can end a ride quickly, damage spokes, or leave you stranded at the side of the road. Knowing how to set bike derailleur limits is one of the most useful home-maintenance skills a cyclist can have. It is a short adjustment, but it demands care: limit screws protect the drivetrain, while cable tension controls how accurately it shifts.
What derailleur limit screws actually do
Your derailleur has high and low limit screws, normally marked H and L. They set the physical end stops for derailleur movement. On a rear derailleur, the H screw limits movement towards the smallest sprocket and the L screw limits movement towards the largest sprocket, nearest the wheel spokes.
These screws do not cure every shifting problem. If the chain hesitates between gears, skips under load, or shifts one gear too far only in the middle of the cassette, start by checking cable tension, cable condition, hanger alignment and drivetrain wear. Limit screws only control the two ends of the cassette.
The same principle applies to a mechanical front derailleur. Its L screw prevents the chain falling inwards towards the bottom bracket, while the H screw prevents it being pushed outwards beyond the large chainring. Set correctly, they provide a small but vital margin of protection.
Tools and checks before you start
Put the bike in a workstand if possible. It keeps the rear wheel clear of the ground and lets you turn the cranks safely while watching the drivetrain. If you do not have a stand, lift the rear wheel carefully or ask someone to hold the bike steady. Never adjust gears with your fingers close to the chain, cassette or jockey wheels.
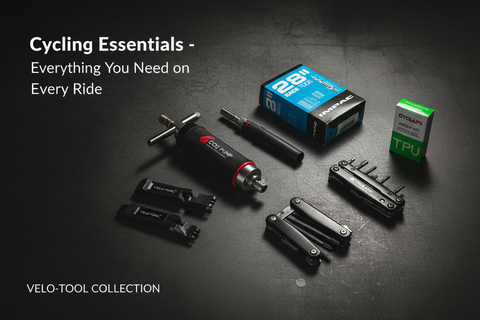
You will usually need a small cross-head screwdriver or a 2 mm or 2.5 mm hex key, depending on the derailleur. A compact precision ratchet kit makes the job neater, especially where modern frames leave little room around the derailleur. Good lighting matters more than most riders expect.
Before turning any screw, check four basics:
- The rear derailleur hanger is straight and the derailleur is securely fitted.
- The wheel is fully seated in the dropouts or firmly secured in the thru-axle.
- The chain and cassette are reasonably clean, with no stiff or visibly damaged links.
- The gear cable is not frayed, corroded or dragging inside its outer housing.
How to set bike derailleur limits at the rear
Start with the rear derailleur because it is where an incorrect low limit can cause the most expensive damage. Shift to the smallest rear sprocket and, if you have a double or triple chainset, use the small chainring. Turn the cranks forwards gently throughout the process.
Set the high limit first
Look directly from behind the bike. The upper jockey wheel should sit in line with the smallest cassette sprocket. If it sits too far outboard, away from the wheel, the chain may struggle to reach the smallest sprocket. If it sits too far inboard, it may try to shift beyond it towards the frame.
Turn the H screw in small increments, typically a quarter turn at a time. Clockwise normally restricts outward travel; anti-clockwise permits more travel. The exact screw layout differs between Shimano, SRAM and other systems, so follow the H and L markings rather than relying on where each screw sits.
Once aligned, shift up and down through the first few sprockets. Do not confuse a noisy shift with a limit issue. If the chain will not move cleanly from the smallest sprocket to the next one, add a little cable tension at the barrel adjuster. Turning the barrel adjuster anti-clockwise usually adds tension. Make changes in quarter turns, then pedal and test again.
Set the low limit with care
Now shift gradually towards the largest rear sprocket. Use the shifter one click at a time rather than forcing it. If the chain cannot reach the largest sprocket, first check whether cable tension is sufficient. The L screw should not be opened simply to compensate for a slack cable.
When the chain is on the largest sprocket, view the upper jockey wheel from behind. It should align directly below that sprocket. If it is sitting too far towards the spokes, tighten the L screw clockwise a quarter turn at a time until the alignment is correct. If it is too far outboard and the chain will not settle on the largest sprocket, loosen the L screw slightly.
This is the setting to treat with real respect. Shift between the largest and second-largest sprockets several times, without excessive force at the shifter. The chain should reach the largest sprocket decisively, yet it must not move beyond it into the spokes. If there is any uncertainty, err on the side of a slightly more restricted low limit and revisit cable tension.
Check the B-tension separately
The B screw, sometimes called the B-tension screw, is not a limit screw. It controls the gap between the upper jockey wheel and the cassette. On wide-range cassettes, especially gravel and mountain-bike setups, this gap has a major effect on shift quality.
With the chain on the largest sprocket, compare the jockey-wheel gap with the drivetrain manufacturer's recommendation. Too close can create noise and poor running; too far can make shifts slow and vague. Adjust in small increments, then recheck shifting across the full cassette. This setting is particularly sensitive after fitting a cassette with a larger largest sprocket.
Setting front derailleur limits
Mechanical front derailleurs need a different approach because cage height, rotation and cable tension all affect the result. Before touching the screws, check that the derailleur cage is parallel with the chainrings and sits roughly 1 to 3 mm above the teeth of the large chainring. If either position is wrong, correct it first.
Shift the chain to the small front chainring and the largest sensible rear sprocket. Release cable tension if needed, then set the L screw so the inner plate of the derailleur cage clears the chain by around 0.5 to 1 mm. It needs enough clearance to run quietly, but not enough movement for the chain to fall towards the frame.
Next, shift to the large front chainring and a small rear sprocket. Set the H screw so the outer cage plate clears the chain by a similar small margin. Shift between rings repeatedly while turning the cranks. The chain should climb promptly onto the large ring without being pushed beyond it.
Some front systems are designed to tolerate a small amount of trim at the shifter, particularly on older road groupsets. That is normal. What is not normal is persistent rubbing in sensible gear combinations, or a chain that can be shifted off either side of the rings.
Electronic and 1x drivetrains
A 1x drivetrain has no front derailleur, so the focus is entirely on rear alignment, limits and B-tension. Wide-range MTB cassettes place the upper jockey wheel close to the spokes in the easiest gear, making a careful low-limit check essential.
Electronic rear derailleurs often use an app or a setup mode for micro-adjustment. Their physical limit screws still act as safety stops, but the manufacturer-specific procedure can differ. Follow the instructions for your exact system rather than applying a mechanical cable-adjustment method to electronic shifting.
Test under realistic conditions
A workstand confirms safety, not perfect performance. Once the bike is back on the ground, take a short, low-traffic test ride. Shift through the cassette under light pressure first, then under normal pedalling load. Avoid changing gear with maximum force through the pedals, especially when climbing, because even a perfectly adjusted derailleur cannot make that shift feel clean.
Listen for clicking in one or two middle gears, which usually points to cable tension rather than limits. Listen for chain rub or an attempted overshift at either end, which points back to the H or L screw. Make one adjustment at a time and remember which direction you turned it.
A precise limit setup takes only a few deliberate minutes, yet it protects some of the most costly parts of your bike. Keep a compact tool kit within reach, make adjustments in small steps, and you will have the confidence to solve a shifting issue before it becomes a roadside problem.


Post Comment