

How to Replace Valve Core on a Bike Tyre
A tyre that slowly loses pressure can turn a quick evening ride into a frustrating pump-up routine. Before blaming the tube, tubeless tape or tyre casing, check the small removable component inside the valve. To replace valve core on a bike tyre is usually a fast, low-cost repair, and it can stop an irritating leak without removing the tyre from the rim.
For road, gravel and mountain bike riders using Presta valves, a fresh core is particularly useful after sealant contamination, accidental damage or a stubbornly leaking valve. With a proper valve-core tool in your repair kit, it is a practical job at home, by the car park or at the trailhead.
When should you replace a valve core?
The valve core is the mechanism inside a removable-core Presta valve stem. On a conventional Presta valve, the small tip nut is opened for inflation and gently closed afterwards. Not every Presta valve has a removable core. On tubeless setups, liquid sealant can dry around the core or block its narrow air path.
A core may need replacing if air loss is traced to its seal, the centre pin is bent, its threads are damaged, or it remains blocked after permitted cleaning. A hissing valve or difficulty inflating calls for diagnosis rather than automatic replacement.
Do not confuse a leaking core with a leaking valve base. Bubbles where a tubeless valve meets the rim can indicate a gasket problem or air travelling beneath damaged rim tape. Replacing the core will not cure those faults.
What you need before starting
This is a compact repair, but precision matters. You need a compatible replacement valve core, a valve-core remover or multi-tool with a suitable core-removal slot, and a pump or CO2 inflator to check the result. Confirm that your exact tube or sealant permits CO2 before using it. A cloth is useful for cleaning away sealant. For a tubeless tyre, have compatible sealant available if replenishment is needed.
Check the replacement against your valve manufacturer's instructions. Avoid forcing a core that does not thread in smoothly. Schrader valves use a different compatible tool and core; Presta and Schrader parts are not interchangeable.
If you are preparing a ride-ready repair setup, keep compatible spare Presta cores with your tyre plugs, mini pump or CO2 cartridges. They weigh very little and may save a ride when a removable core becomes blocked miles from home.
How to replace valve core safely
1. Position the valve and fully deflate
For a tubeless setup, rotate the wheel so the valve is near the top and allow liquid sealant to move away from the valve opening. Remove the dust cap, then open the small Presta tip nut.
Release the air slowly by pressing the centre pin. Fully depressurise both tube and tubeless systems before loosening the core. A blockage can trap pressure, so do not assume a tyre is depressurised just because the core does not release air. If you cannot confirm pressure has been released safely, stop and ask a mechanic. Follow the valve manufacturer's procedure and use eye protection where required.
2. Remove the old core with the correct tool
Fit the core-removal tool over the flats at the top of the valve core. Turn it anti-clockwise with steady, controlled pressure. If it feels seized, do not apply excessive force that could twist or damage the valve stem.
Once loose, finish removing it by hand and place it somewhere clean. Inspect for dried sealant, bent parts, damaged threads or a deteriorated seal. A visually clean core can still leak, so check the source of the fault rather than relying on appearance alone.
3. Clean the valve stem and fit the replacement
Wipe the top of the valve stem with a clean cloth. Clean only as the valve maker permits. Do not use a sharp object, push debris into the valve or use an uncontrolled blast of compressed air to clear a blockage. A persistently blocked or damaged valve may require replacement or workshop attention.
Thread the compatible new core in by hand first. It should engage easily and sit straight. Secure it using the correct tool and the valve manufacturer's tightening instructions. Over-tightening can damage the seal, strip fine threads or make the next replacement difficult.
4. Inflate and test the repair
Inflate gradually to a suitable pressure within all applicable tyre, rim and tube limits. Follow hookless compatibility and pressure requirements where relevant. Inspect bead seating on both sides; do not assume a previously used pressure is necessarily correct for the current setup.
Listen around the valve and, where permitted, use a small amount of soapy water to help locate a leak. Continuous bubbles indicate escaping air. If the core still leaks, fully release pressure before removing it again. Check compatibility, seating, threads and seals rather than repeatedly tightening it harder.
Once inflation is complete, gently screw the conventional Presta tip nut down to the closed position, then fit the valve cap. The cap keeps grime out but is not a substitute for a functioning core. Confirm pressure retention before riding.
Tubeless valve-core problems and sealant blockages
Tubeless riders may encounter core contamination because sealant can enter the valve. Positioning the valve near the top before releasing air or removing a pump head can help keep liquid away. Follow the sealant manufacturer's filling procedure, which may specify a different wheel position for adding sealant.
A lightly contaminated core may be cleanable if the valve maker permits it. Use only its recommended method and cleaner. Do not soak seals in an improvised solvent. Replace a damaged or persistently leaking core with a compatible part.
If inflation remains blocked after fitting a suitable clean core, investigate the stem according to its maker's instructions. Do not force sharp tools into it or attempt to clear it with uncontrolled pressure. Replacing a heavily contaminated tubeless valve may be more dependable, but first rule out damage to the tape or rim seal.
Common mistakes that create a new leak
Using pliers or an improvised tool can damage the core flats or twist the stem. A suitable valve-core tool gives better control and remains compact enough for a saddle bag, frame storage or waterproof tool case.
Another mistake is assuming every pressure loss comes from the core. Check the tyre for punctures and the valve base for leakage. Inspect tubeless tape if symptoms point beneath it. On an inner tube, a split around the valve base usually requires tube replacement; tightening the core cannot repair torn material.
CO2 compatibility depends on the exact sealant and tube. Follow their instructions, including any requirement to replace CO2 with air after an emergency inflation. A suitable hand or floor pump is useful for controlled testing without consuming a cartridge.
Build a valve repair kit that earns its space
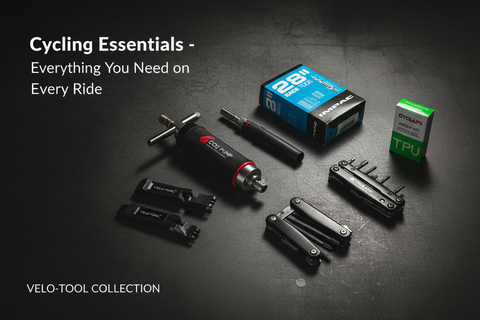
A reliable valve repair kit does not need to be bulky. Carry a suitable core tool, compatible spare Presta cores, tyre plugs for permitted tubeless repairs and dependable inflation. Add tyre levers and a TPU inner tube if it is compatible with your wheel, tyre and brake system.
A spare tube or plug does not make a damaged bead, structural sidewall cut or compromised rim safe. Arrange recovery if the damage is outside the tyre maker's permitted repair scope.
Velo-Tool's compact approach suits this kind of preparation: carefully chosen components can solve faults without carrying a mobile workshop. The next time a tyre loses pressure, diagnose the source, use the exact compatible part and test the repair before heading off with the group.


Post Comment